Quick Start
Welcome! This guide will help you set up your Kispay account and start accepting payments in minutes.
Prerequisites
Before you begin, ensure you have:
✓ A registered business in Ethiopia or supported regions
✓ A valid business email address
✓ A bank account for receiving settlements
✓ Valid identification and business documents for KYC verification
Step 1: Registration Process Overview
Create an Account
- Visit merchant.kispay.et
- Click “Create Account”
- Sign up with your basic information to get started. Create an account on the KisPay Merchant Dashboard with the above basic requirements
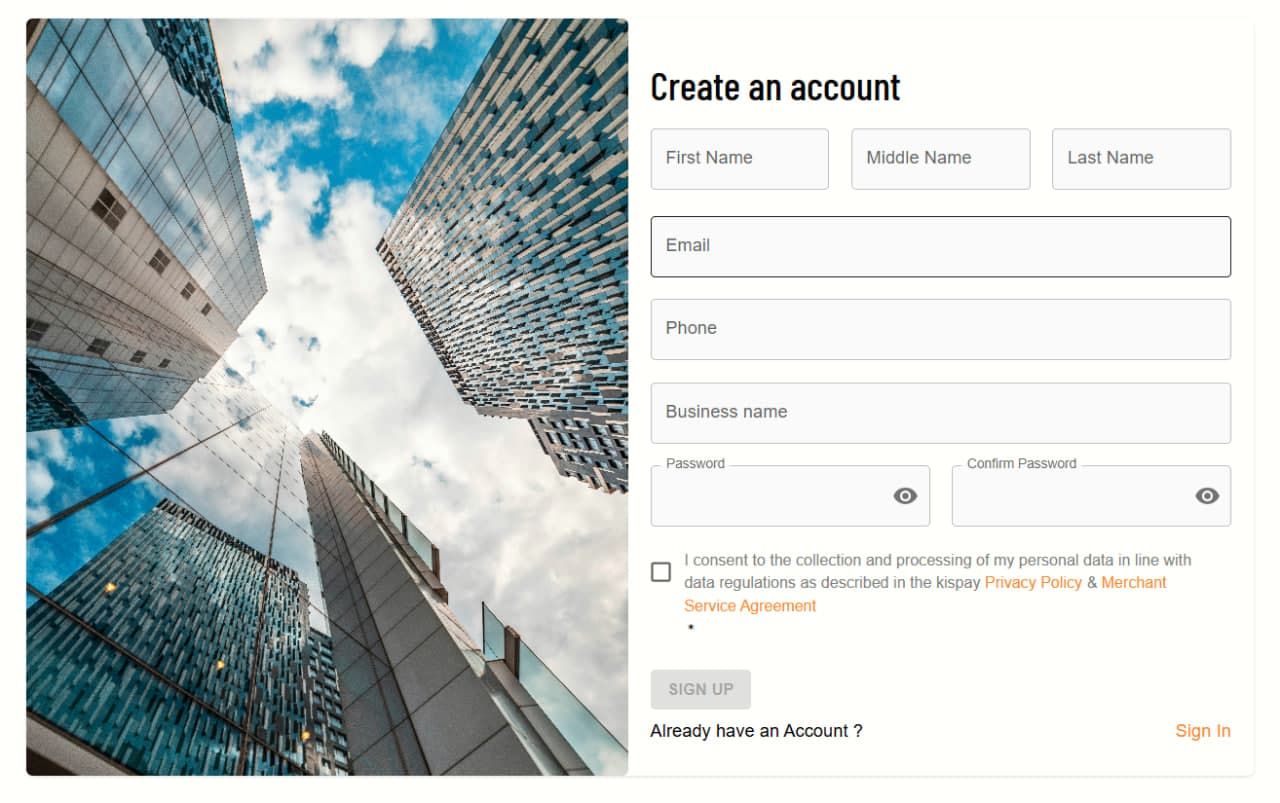
After successful registration, you will be redirected to the merchant portal dashboard, which serves as a sandbox for testing. To move to production, proceed to the next step.
Business Information Setup
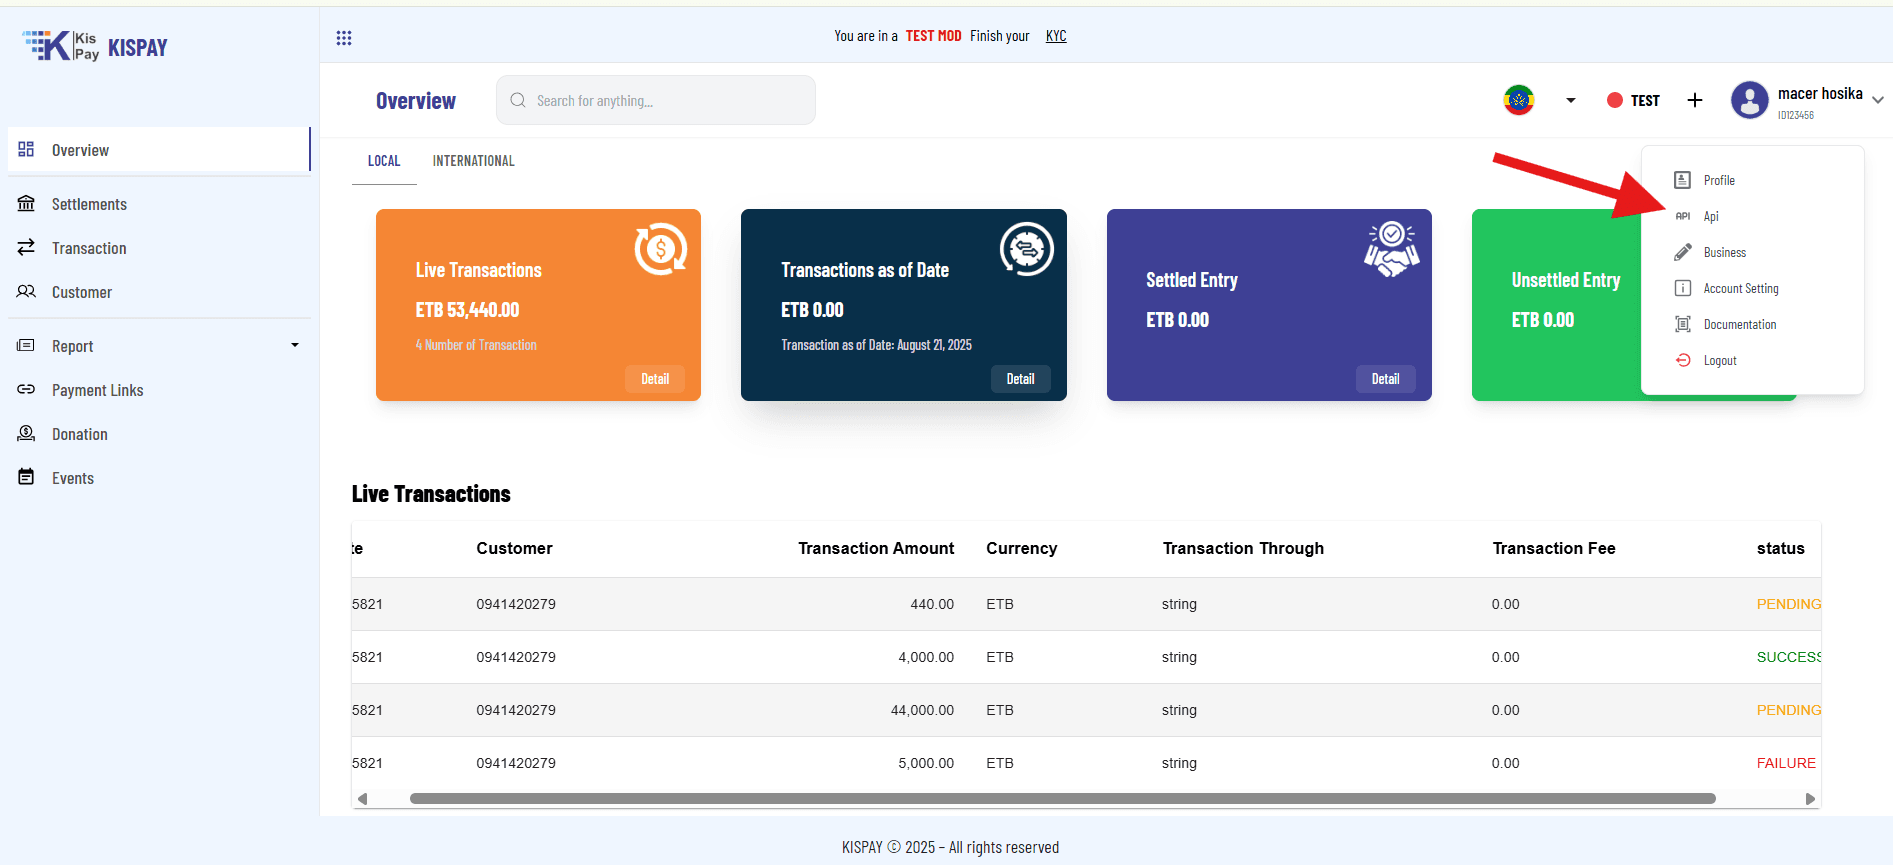
- On the merchant portal, navigate to your initial profile page.
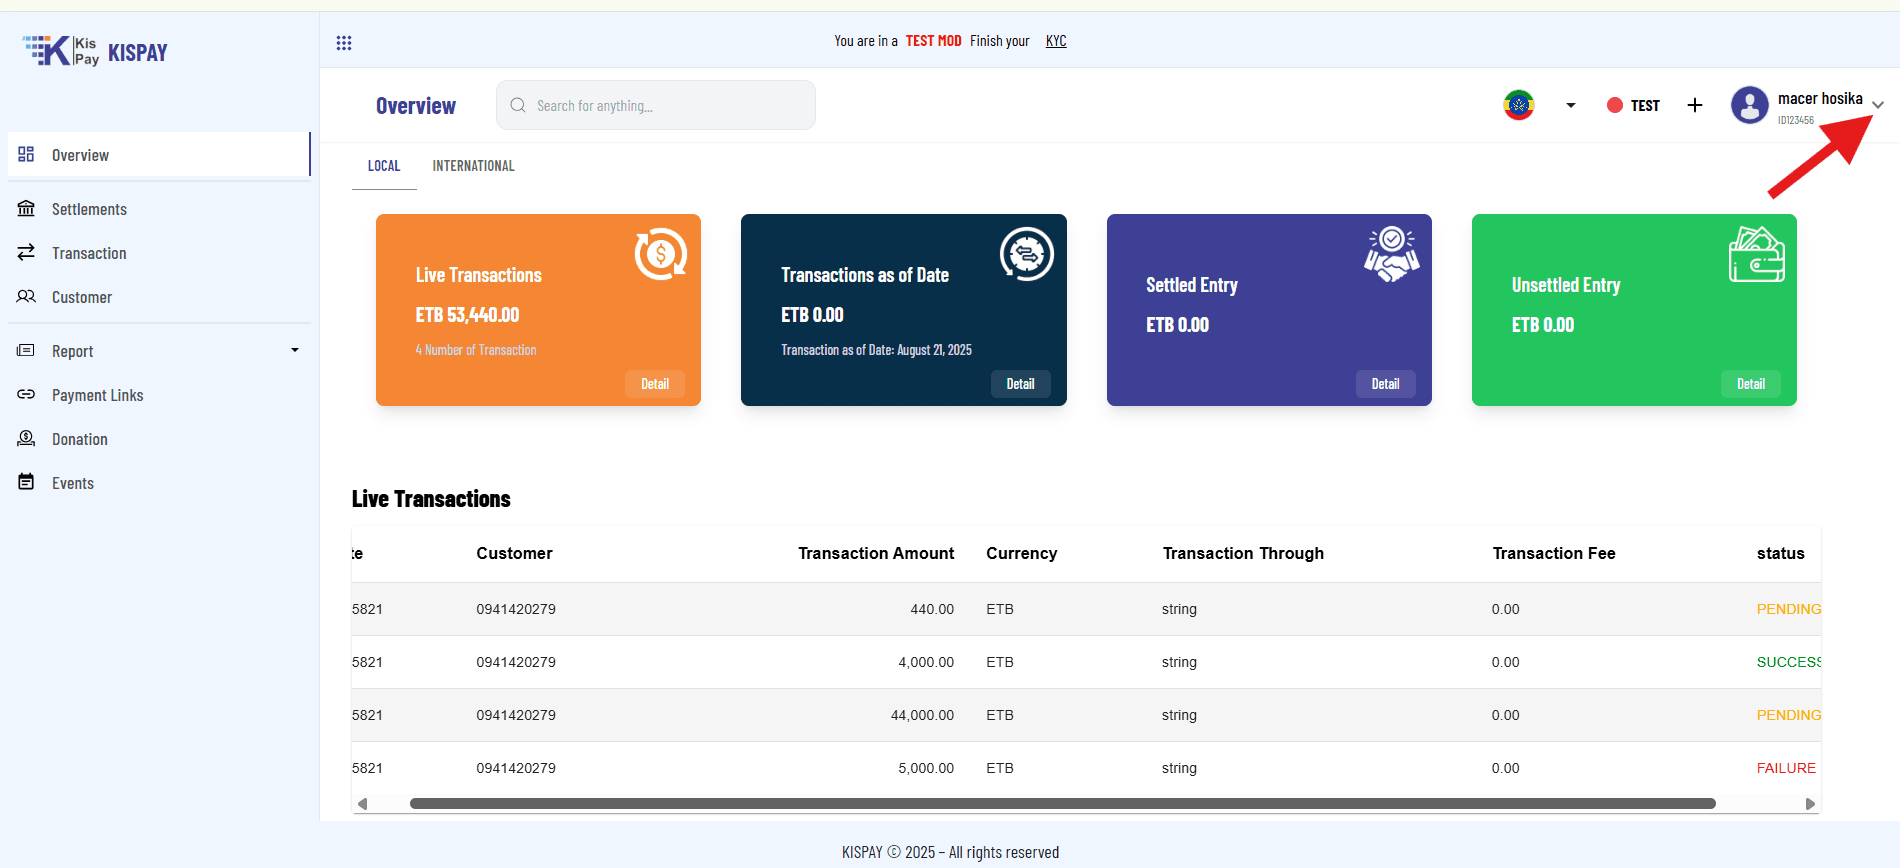
- Click the dropdown icon, then select the Business navigation button.
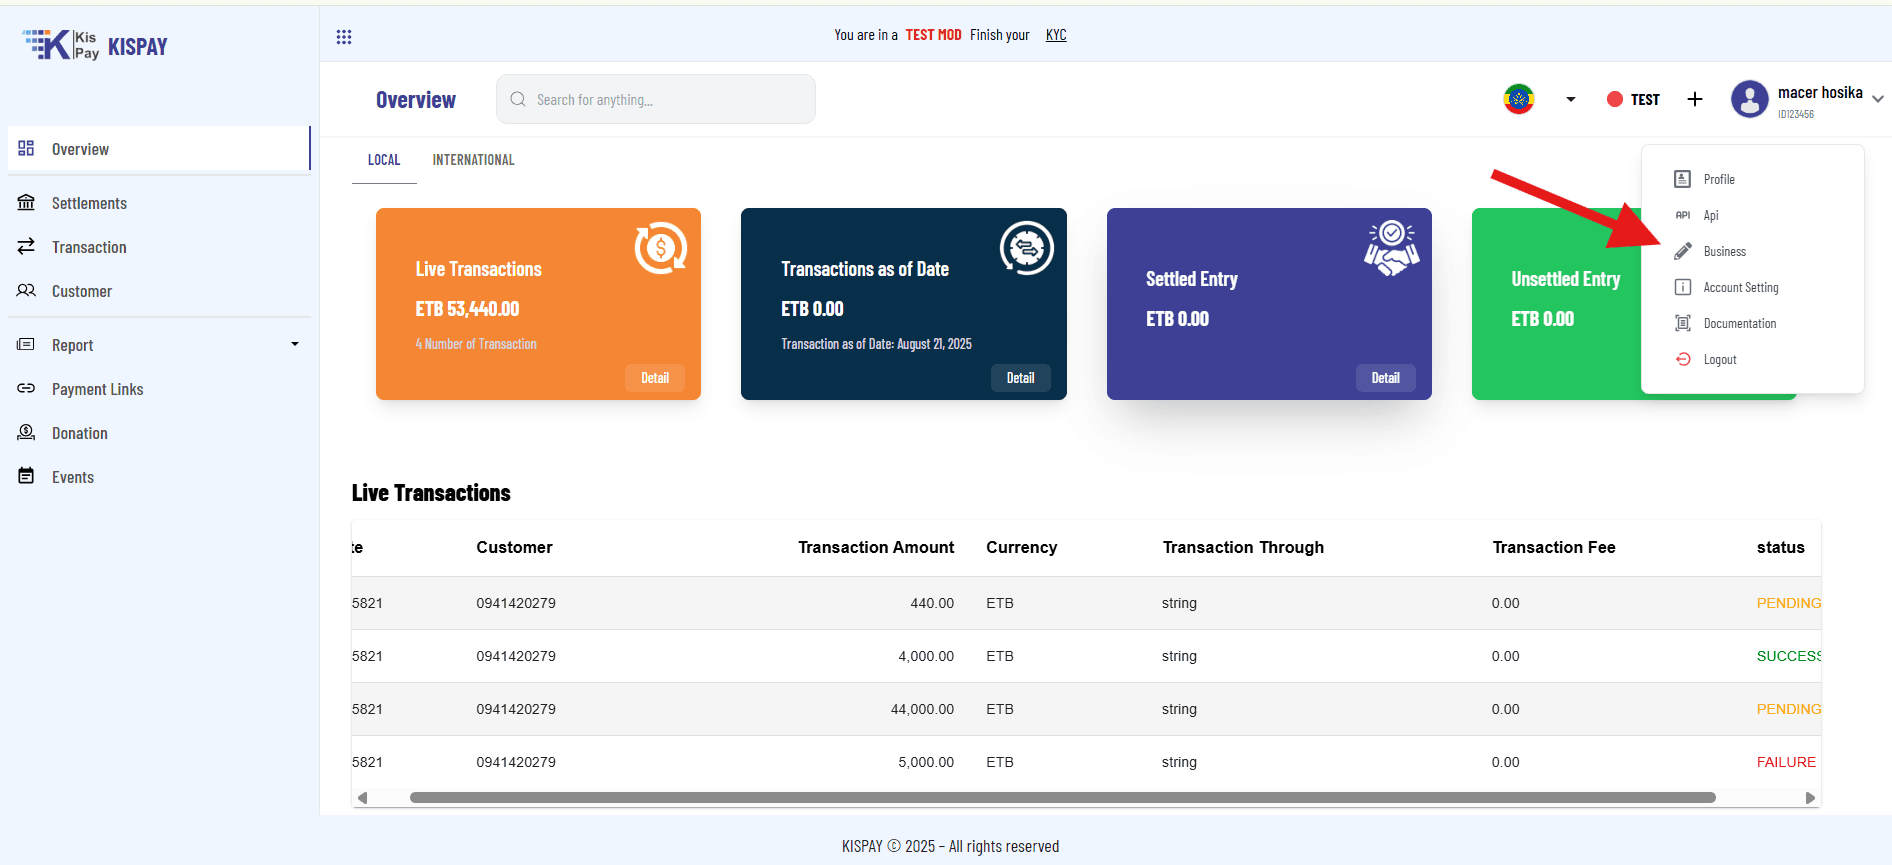
- You will be redirected to the business information page. Click the Edit button to fill in all required information.
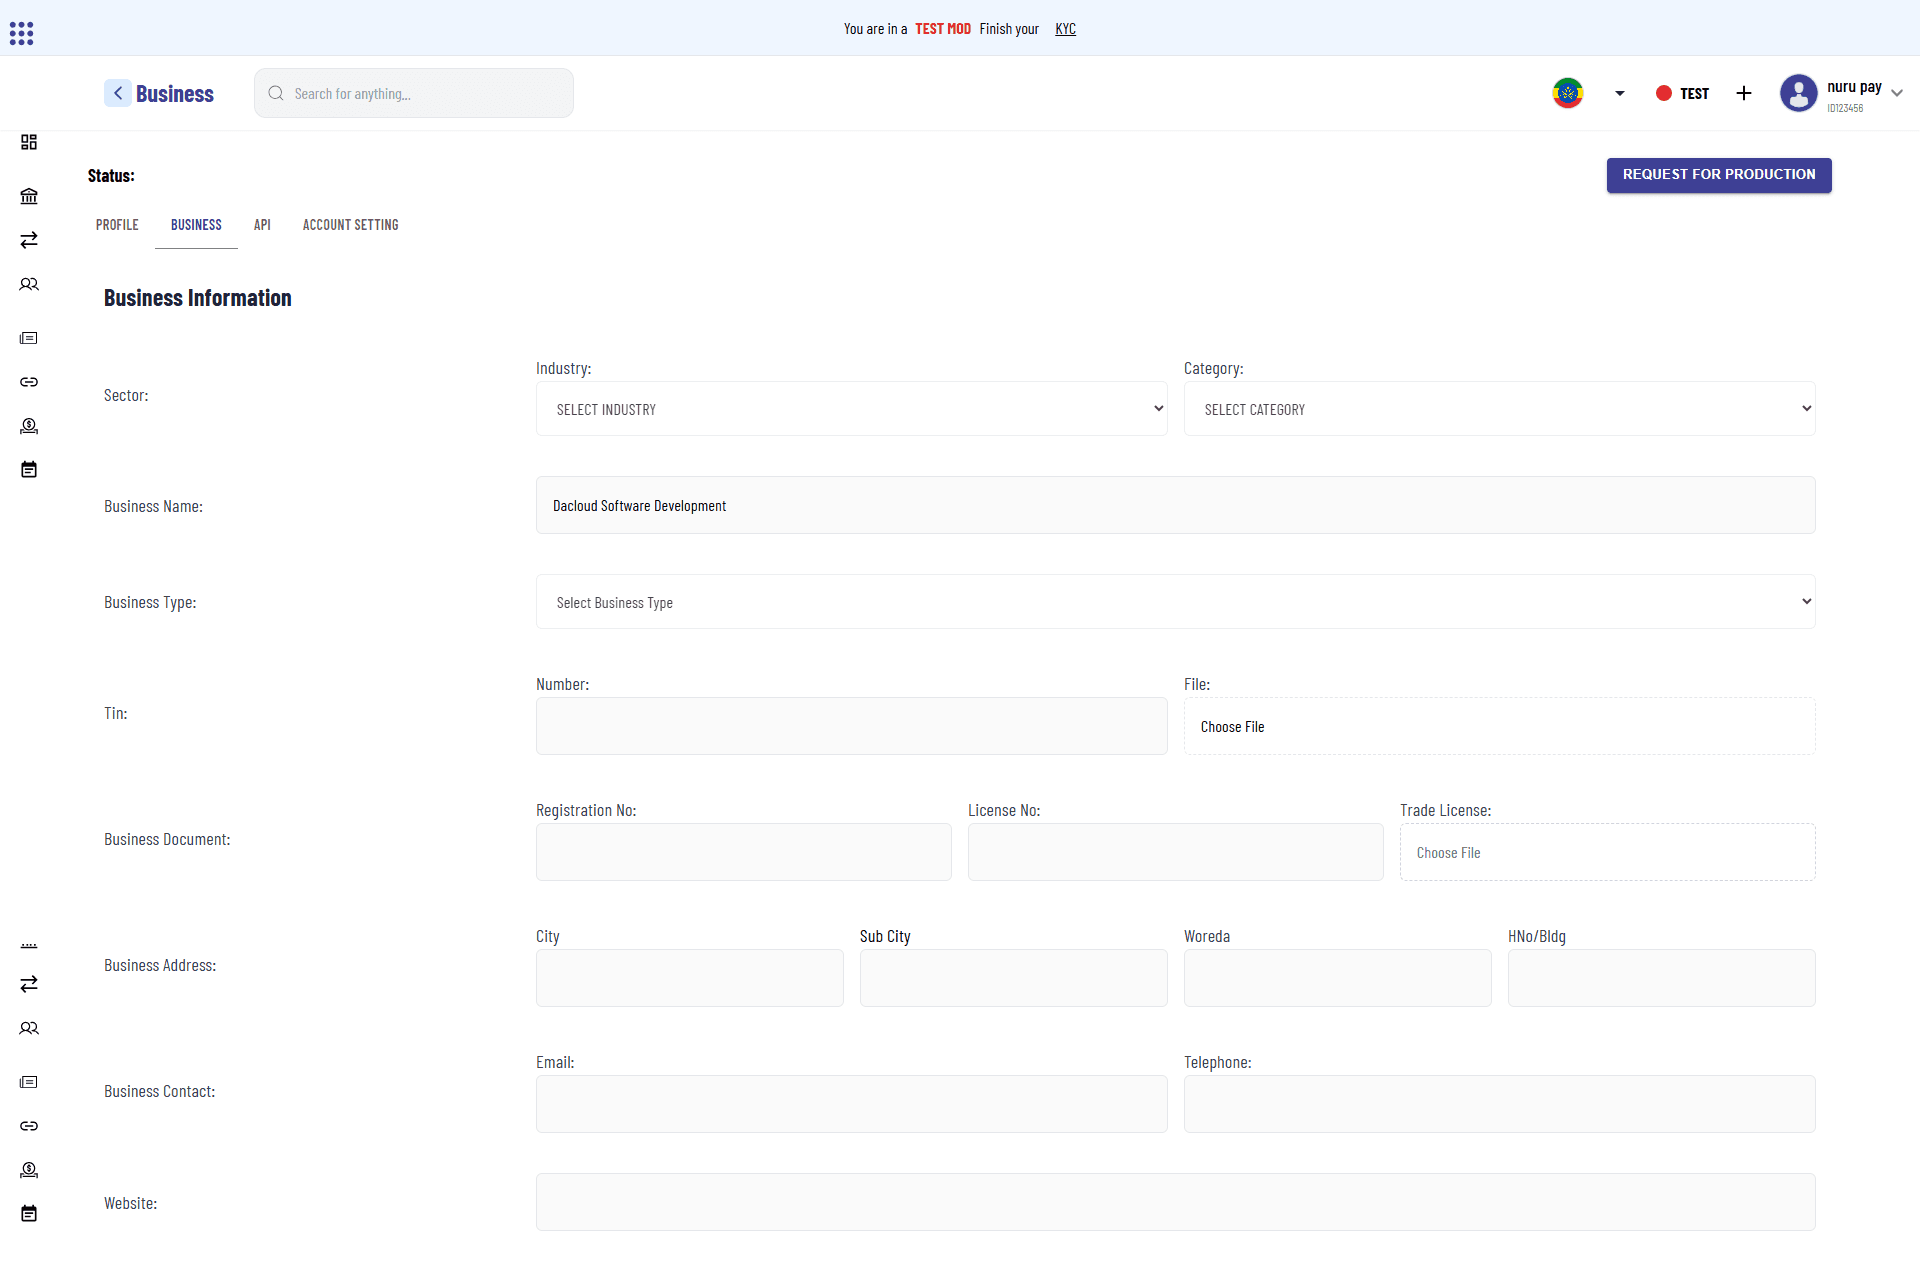
- After submitting the required details, request production access.
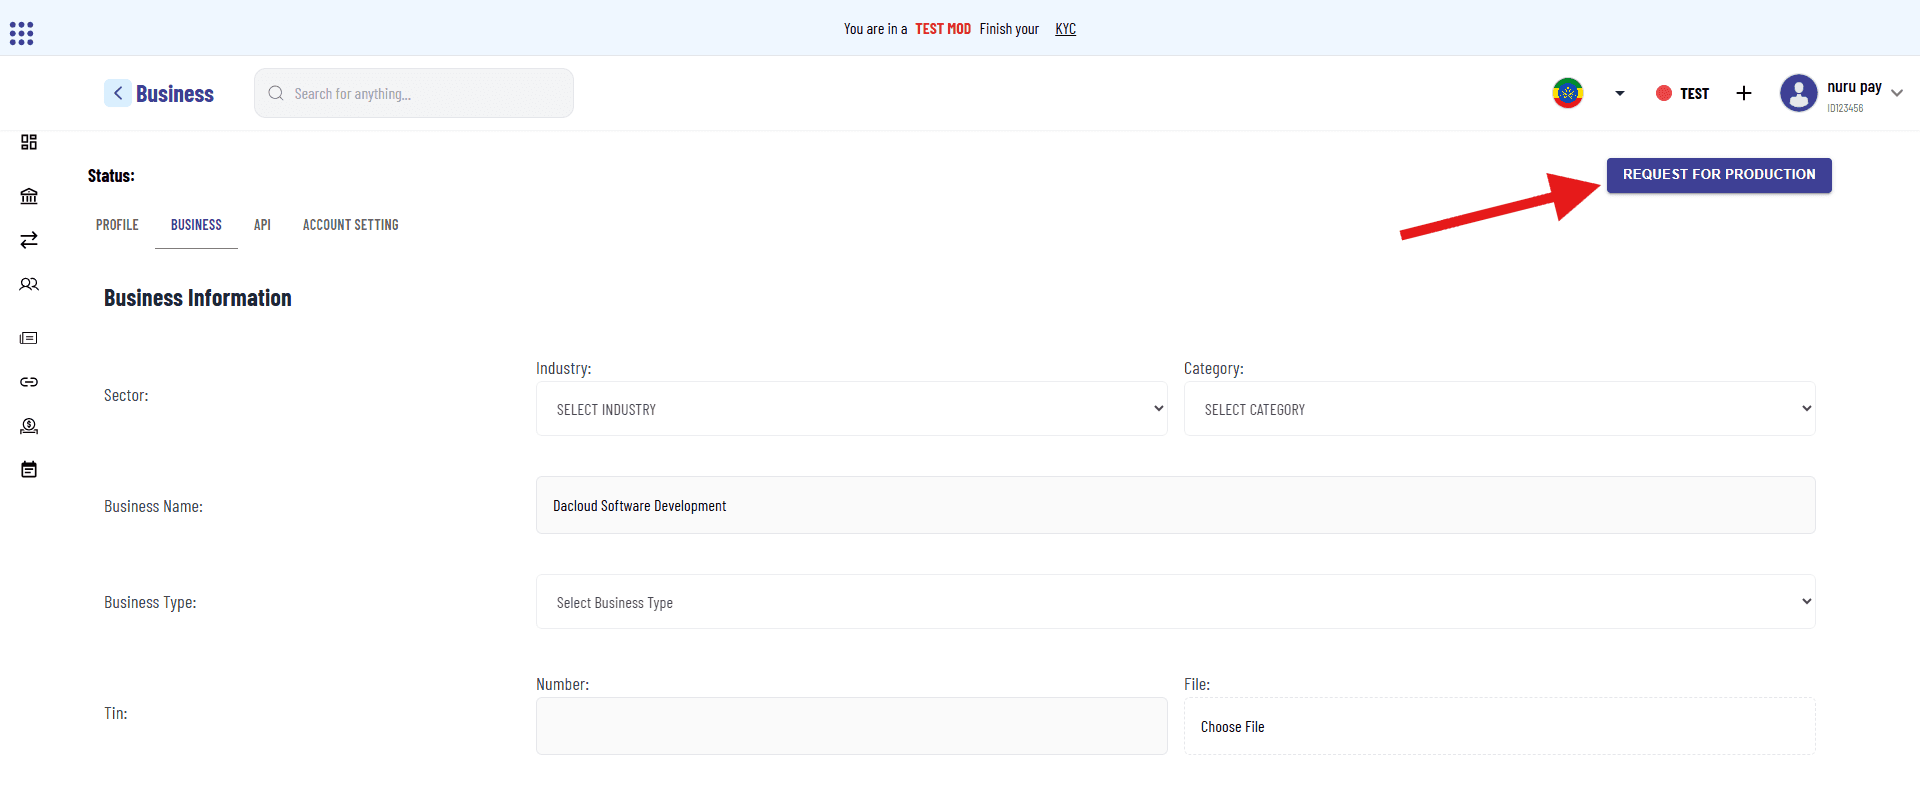
- After a careful validation and authorization process, you will be notified via email and SMS within a short period and redirected to the production environment.
Step 2: Get Your API Key
For Developers:
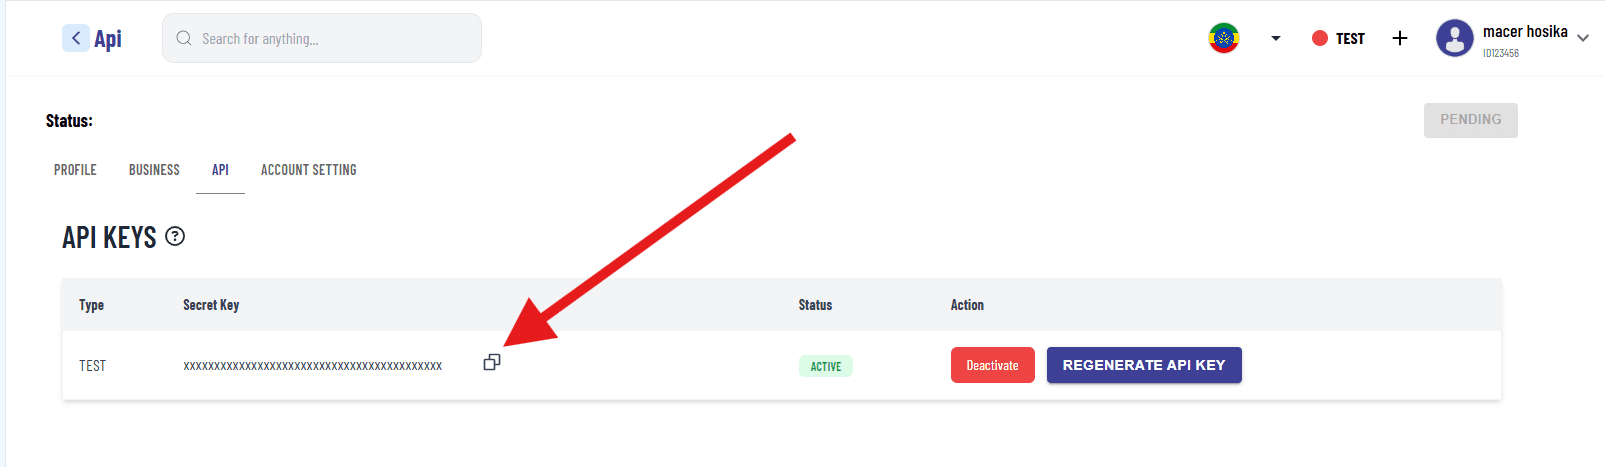
API Key: A unique authentication token used to securely access the API and authorize requests. Obtain it from the merchant portal dashboard by clicking the copy icon. You can generate a new key by clicking Regenerate API Key.
For Non-Technical Users:
You can skip this step and use the dashboard to create payment links, QR codes, and donation pages manually.
Use the Kispay dashboard to create:
- Payment Links: directs customers to a payment page where they can complete a transaction and Share via email, WhatsApp, or social media
- QR Codes: For in-store payments
- Donation Pages: For nonprofits and fundraising
- Event Tickets: Sell tickets with multiple types and quantities
Learn more in the Merchant Guide
Step 3: Choose Your Preferred Integration Type
Once you have your API key from the KisPay Merchant Dashboard, follow these steps to quickly integrate KisPay into your application. KisPay supports two main integration flows: Redirect Checkout (hosted payment page) and Direct Checkout (embedded payments). Choose based on your needs.
Direct Checkout (Embedded Experience):
Direct Checkout allows merchants to integrate payment processing directly into their website or mobile application without redirecting customers to an external payment page. This approach embeds the payment interface within the merchant’s UI, providing a seamless, in-app payment experience.
Learn more in the redirect checkout
Redirect Checkout (Quick and Simple):
Redirect Checkout provides a hosted payment solution where customers are redirected from the merchant’s site to a KisPay-hosted checkout page to complete their payment.

Learn more in the direct checkout
Step 4: Test Your Integration
Before deploying your integration to your production environment,it is important to test it thoroughly.
- Test Environment: Use
https://api.kispay.et/apiwith a test API key. - Sample Test: Use the following JSON request payload to test session creation:
{
  "url": "https://api.kispay.et/api/checkout/create_session",
  "method": "POST",
  "headers": {
    "Authorization": "Bearer YOUR_TEST_API_KEY",
    "Content-Type": "application/json"
  },
  "body": {
    "amount": "1",
    "orderNo": "TEST-001",
    "description": "Test payment",
    "successUrl": "https://yoursite.com/success",
    "cancelUrl": "https://yoursite.com/cancel",
    "merchantBusinessName": "Test Business"
  }
}Step 5: Go Live and Monitor Your Transaction
Replace the test API key with the production key, and monitor transactions at Kispay Merchant Portal . For detailed implementation, see the Detailed Integration Guide.
Need Help?
- General Support: support@kispay.et
- Developer Support: developers@kispay.et